When homeowners ask me how to design energy-efficient homes, they often start with solar panels or a new heat pump. I understand the instinct. Those upgrades are visible, exciting, and easy to discuss at the kitchen table. But the highest-value work usually starts with the boring stuff: stopping unwanted air movement, improving insulation, and measuring where the energy goes. Your house should work for you, not the other way around.
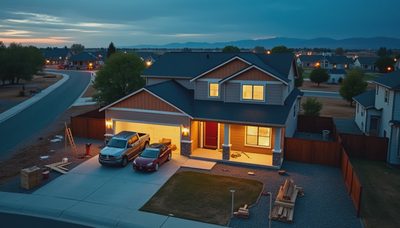
My 2003 Boise house is a useful example. It is a 2,400-square-foot builder-grade box, not a custom passive house. I have improved it in stages while raising two kids, coaching Little League, and trying to keep my garage fermentation chamber from becoming a science experiment. The process taught me that efficiency is less about buying one perfect product and more about putting upgrades in the right order.
Start with the building envelope
The building envelope is the boundary between conditioned indoor space and the outdoors. In plain English, it is the roof, walls, windows, doors, foundation, and every seam connecting them. If the envelope leaks, expensive heating and cooling equipment is working against a steady outdoor draft.
Before choosing equipment, schedule an energy audit or perform a basic inspection. Look for attic insulation that is thin or uneven, recessed lights that leak into the attic, weatherstripping that has gone flat, and plumbing or wiring holes in the floor of an attic. A blower-door test is especially useful because it measures how much air the house loses under pressure. Infrared imaging can also reveal cold ceiling corners and missing insulation, although it works best when indoor and outdoor temperatures differ substantially.
Air sealing often offers a better first return than replacing windows. Use appropriate caulk around stationary cracks, expanding foam around larger penetrations, and weatherstripping around moving doors. Do not block intentional combustion-air openings or ventilation systems. The goal is controlled airflow, not a sealed box with stale air.
In my own attic, a contractor found several open wire penetrations above the hallway. Sealing those gaps did not produce a dramatic before-and-after moment, but the upstairs temperature became more even. That matters more than a gadget dashboard if your family is avoiding one uncomfortable room.

Size heating and cooling equipment after the repairs
A common mistake in learning how to design energy-efficient homes is selecting a furnace or heat pump based on the old utility bill. That bill reflects the leaky, under-insulated house, not the house after improvements. Once air sealing and insulation reduce the load, the original equipment can be oversized.
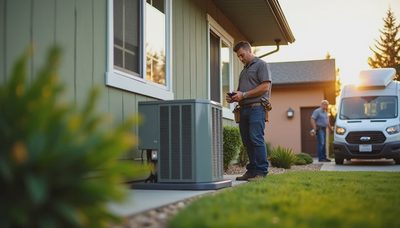
A heat pump is simply an air conditioner that can run in reverse. In summer, it moves heat outside. In winter, it moves heat inside. Modern cold-climate models can perform well in many northern regions, but installation quality matters: refrigerant lines, airflow, defrost behavior, thermostat settings, and backup heat all affect results.
Ask a contractor for a room-by-room load calculation rather than accepting a replacement sized from the existing unit. Oversizing can cause short cycling, uneven temperatures, and poor humidity control. A properly selected system may run longer at a lower output, which is often more comfortable and efficient.
My first heat-pump estimate was based on the old furnace size. I got this wrong the first time and nearly approved equipment larger than the house needed. A second calculation produced a smaller recommendation and a clearer explanation of when electric resistance backup would operate. That extra conversation was worth more than a flashy thermostat.
Insulate the places that matter most
Insulation slows heat movement; it does not stop air movement. That distinction explains why adding insulation over a leaky attic can disappoint. Seal the attic floor first, then install enough insulation to create a consistent layer without compressing it or burying unsafe electrical components.
The attic is often the easiest target, but floors over crawl spaces, rim joists, and exposed ducts can also deserve attention. In a finished basement, rim-joist sealing can reduce cold drafts near the perimeter. In a vented crawl space, moisture management and local building practices must be considered before closing anything up.
When comparing bids, ask what material is being installed, what final depth or performance level is expected, and how the crew will handle access hatches, recessed lights, and ventilation. A low price that leaves gaps is not a bargain. Keep photos of the work before the insulation covers the area; those images help with future repairs and resale documentation.
Add smart controls after the physical work
Smart technology is valuable when it changes behavior automatically. It is not valuable when the family must open three apps to make the living room comfortable. After the envelope and equipment are addressed, add controls that solve specific problems.
A programmable thermostat can reduce heating or cooling while the house is empty. Room sensors can help identify temperature differences, but they cannot repair poor insulation. Circuit-level energy monitors can show whether a water heater, dryer, or backup heater is driving a peak bill. A simple dashboard in Home Assistant helped me spot that our auxiliary heat was running during mild weather because of an incorrect thermostat setting.
For how to design energy-efficient homes with automation, think in terms of rules and exceptions. A rule might lower the setpoint during school hours. An exception might keep the nursery comfortable when someone is home sick. Do not automate every light and outlet before automating the systems that consume hundreds of watts or more.
Choose equipment with local control where practical. Cloud services can change pricing, lose connectivity, or disappear. A basic schedule that still works when the internet is down is more useful than a sophisticated scene that fails during a router reboot.

Use solar and batteries after reducing demand
Solar can be a strong upgrade, but panels should not be the first answer to an inefficient house. If insulation, air sealing, and equipment improvements lower annual consumption, the same roof area can cover more of your remaining load. That can reduce the number of panels required and simplify the financial decision.
Review at least twelve months of utility data before requesting proposals. Separate seasonal heating and cooling from steady loads such as refrigeration and water heating. Ask installers to show expected annual production, estimated degradation, equipment warranties, and how shading was evaluated. Get multiple bids, and treat unusually aggressive savings promises as a reason to ask more questions.
A battery can provide backup power and shift energy use, but it is not automatically the best investment. Its value depends on outage frequency, utility rates, available incentives, and whether the system can power the circuits your household actually needs. A small backed-up panel for refrigeration, internet equipment, lights, and a heat-pump control system may be more practical than trying to run the whole home.
Build a five-year upgrade sequence
The most realistic answer to how to design energy-efficient homes is a sequence that fits cash flow and maintenance schedules. In year one, measure energy use, fix obvious air leaks, and improve attic insulation. In year two, address ducts, crawl spaces, water heating, or aging HVAC equipment. In year three, consider a heat pump and electrical-panel planning. Solar, batteries, and advanced controls can follow once the load is understood.
Set a budget for each stage and record the result. Compare weather-normalized utility use when possible, but also track comfort: bedroom temperature, basement humidity, and how often the system cycles. A $600 air-sealing project that eliminates a cold hallway can be more satisfying than a $20,000 upgrade with no noticeable comfort change.
For homeowners researching how to design energy-efficient homes, the practical starting point is simple: measure first, fix the envelope, size equipment correctly, then automate and generate what remains. That approach avoids expensive gadget detours and makes every later improvement easier to judge. The best retrofit is not the one with the longest feature list. It is the one that lowers bills, improves comfort, and keeps doing its job when nobody is watching the dashboard.


Letters
No letters yet — be the first to write.